Installing Dummy Dome Camera Systems provides an affordable, efficient security solution for residential and commercial spaces. These realistic cameras, with adjustable heads, LED lights, and wireless options, act as powerful visual deterrents against intruders. The simple installation process involves mounting the dome and connecting power. Regular maintenance ensures optimal protection and long-term functionality of these modern, aesthetically pleasing security devices.
“Elevate your home or business security with the innovative Security Camera Shell with Lights. This article delves into the world of Dummy Dome Camera Systems, exploring their benefits and unique features. Learn how these systems enhance surveillance while offering a sleek, subtle aesthetic. We’ll guide you through the installing dummy dome camera systems process, from initial setup to maintenance tips, ensuring optimal performance and longevity. Discover why this advanced technology is a smart choice for any security-conscious individual.”
- Understanding Dummy Dome Camera Systems
- Benefits of Installing a Security Camera Shell with Lights
- The Installation Process: Step-by-Step Guide
- Maintenance and Considerations for Longevity
Understanding Dummy Dome Camera Systems
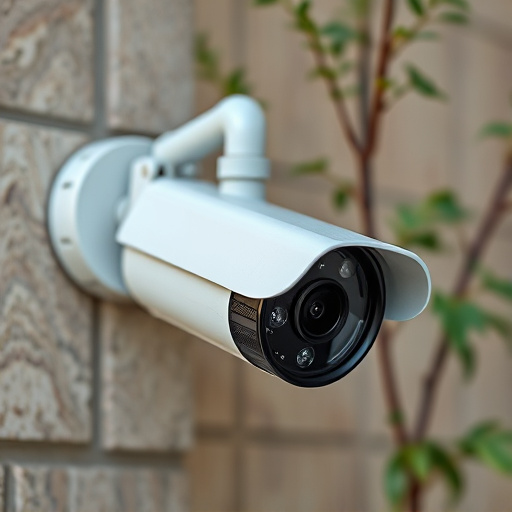
Dummy Dome Camera Systems offer a clever and cost-effective solution for enhancing security in various settings, from homes to businesses. These systems are designed to mimic real security cameras, complete with realistic features like LED lights and adjustable heads, making them an attractive option for deterring potential intruders. Installing these dummy cameras is straightforward; they typically involve mounting the dome on a wall or ceiling and connecting it to a power source. The LED lights can often be adjusted to different brightness levels, allowing you to customize their appearance to blend seamlessly with your environment.
Understanding how these systems work is key to effective security measures. Dummy Dome Cameras are usually wireless, relying on battery power or integrated solar panels for operation, ensuring flexibility in placement. Their design encourages potential thieves to believe a real camera is present, deterring them from targeting your property. With their realistic features and easy installation process, these systems provide an affordable way to boost security while adding a touch of modern aesthetic to any space.
Benefits of Installing a Security Camera Shell with Lights
Installing a security camera shell with lights offers numerous advantages for enhancing home or business security. One of the primary benefits is the deterrence factor. Dummy dome camera systems, when strategically placed, can serve as a powerful visual deterrent to potential intruders. Their presence alone can make criminals think twice before attempting any unauthorized entry, thus reducing the risk of burglary or theft.
Additionally, these cameras provide round-the-clock surveillance and lighting solutions. The built-in lights ensure that areas are well-illuminated, allowing for clear visibility even during nighttime hours. This not only aids in identifying potential threats but also facilitates better monitoring of entry points and vulnerable zones. With their discreet design and advanced features, security camera shells with lights represent a modern approach to safety, offering peace of mind and enhanced protection.
The Installation Process: Step-by-Step Guide
Installing a dummy dome camera system is a straightforward process that can enhance your home or business security in no time. Here’s a step-by-step guide to help you navigate through the setup:
1. Preparation: Begin by gathering all necessary components, including the dummy dome camera, mounting hardware, and lights (if applicable). Ensure a clear view of the area you wish to monitor and prepare the surface for mounting. Clean and dry the installation location to ensure optimal adhesion.
2. Mounting: Attach the camera to the provided mount or base using the included screws or adhesive, depending on the system. Position it strategically, ensuring it captures the desired field of view without obstructions. Secure the mount firmly to avoid future tampering. For outdoor installations, consider weatherproof seals to protect against environmental factors. If lights are included, attach them to the camera housing or nearby surface, aiming them to provide adequate illumination while minimizing glare.
Maintenance and Considerations for Longevity
Regular maintenance is key to ensuring your security camera shell with lights, or Dummy Dome Camera Systems, provide optimal protection for years to come. While these systems are designed for durability, periodic inspections and care will safeguard against potential failures and ensure their continued effectiveness as a deterrent. Inspecting the outer casing for signs of damage or wear, cleaning the lenses, testing all lighting elements, and verifying proper camera functionality should be routine tasks. Additionally, keeping records of maintenance activities can help identify trends and prevent future issues before they arise.
Installing a security camera shell with lights, or a dummy dome camera system, offers a cost-effective and aesthetically pleasing alternative to traditional surveillance. By understanding these systems and their benefits, you can enhance your property’s security while maintaining a subtle presence. Following the step-by-step installation guide ensures a seamless process, and proper maintenance will guarantee longevity. Embracing this technology is a smart move for anyone seeking advanced protection without compromising on style.